Showing posts with label vertical garden. Show all posts

Monday, 21 March 2016

Vertical Garden Project DIY

In one of my earlier posts, I mentioned that I was going to make a vertical garden by myself. Well, finally, over the last two weekends, I had completed the project. I had chosen to use a single pole hanger instead of the aluminium frame. The reason is that it is cheaper as the hanger costs $12.90.


The things that I bought for my vertical garden:

(1) Single pole hanger stand from Giants at $12.90 (promotional price). Usual price is $19.90
(2) Wall planter hanging pockets (18 pockets) - 2pieces at $21 per piece (via eBay.com)
(3) 3 poles from Daiso (@$2 each)
(4) Felt (black colour) 70cm x 60cm from Daiso (@$2 each). Each felt (70cm x 60cm) can cut into 4 pieces of 12"x12".
(5) Base pot - $98 from World Farm
(6) Many plants (ranging from $3 to $12) from World Farm
(7) Cable ties

I setup the hanger stand and then tied the poles to the hanger to make a frame for the hanging pockets. I have two of the pockets to cover the hanger. The hanger is slightly smaller at 86cm instead of 100 cm for the two pockets. So the two edges of the pockets will be hanging without support.


I placed the base pot of plants on the shoe rack of the hanger. This will act as a support to secure the hanger upright and not topple over due to the weight of the hanging plants. We got a good deal at the World Farm because just the pot alone will cost us $90. We got the whole pot with plants for only $98. The pot is quite heavy and we needed two persons to carry it.


Next, we needed a lot of plants to cover the 36 pockets. We had little time over the weekend at World Farm. We just grabbed the plants that we thought would be great on the vertical garden. While I was choosing the plant, I would take a photo of the name and price.


The World Farm provides free delivery if the total amount after GST is above $200. We managed to exceed the amount by a bit after we added a Bougainvillea grafted mushroom shaped @ $68. As we live in the area, World Farm was able to deliver in the afternoon on the same day. Whew! I didn't have to put all the plants and Bougainvillea into my car. We left the World Farm at about 12.45pm. The plants were delivered by 2.30pm. The worker there was quite helpful and the purchase was a pleasant one.


The Bougainvillea was in a mess, many branches protruding out of the mushroom dome. I used some green coloured wires and managed to neaten the Bougainvillea back to its mushroom shape. There were many dried twigs and I had removed quite a number. I was afraid that any colour branch might have dried up and I would loose one colour. Currently, there are four colours on the graft. Maybe if I can find other colour (say blue), I can graft it onto the root stock.
The four colours are:
  1. White
  2. Chilli Red
  3. Orange
  4. Pink


Ok, enough on the Bougainvillea, next time, I will blog on the Bougainvillea and maybe I will start my grafting of another pot using many colours.

I had all the plants that I needed and I had cut the felt sheet (70cm x 60cm) into 4 pieces (12" x 12"). There are 36 pockets, so I will need 9 felt sheets. You can get the black felt sheets at Daiso for $2 each. You may use other colours but I prefer black since soil is black in colour. I was tempted to use green but in the end, I used black.

Take one felt sheet (12" x 12") and lay it on the floor with one corner towards you. Remember to lay some protective covers below so that it will not be too messy to clean after you have completed the vertical garden.


Fold the opposite corner toward the centre.


Place some soil onto the folded area.


Remove the plant from the container or wrapper and loosen the soil to remove some of them. We don't want to have too much soil in the felt and pocket.


Place the plant with the root ball below the folded edge. Flip up the corner facing you towards the centre.


Flip up the folded edge towards the top.


Fold the right corner towards the left side.


Fold the left side towards the right.


Tie the folded felt with a rubber band.


Place the wrapped plant into the wall planter pocket one at a time. You can remove and re-arrange them when you have completed the 36 pockets. You can probably skip one or two pockets where the plants are too big and have covered the area. 


Finally, all 36 pockets had been filled up. The bottom left portion where the money plants are is a bit bare. I had actually split the money plants into two portions (to reduce cost) and I knew that the money plant will grow pretty fast to cover that area.


After I had completed the vertical garden, it was time to water them. I used a watering can with pointed mouth so that I can target the soil easily while watering. I tried not to water too much as the excess water will flow downwards. I will monitor the vertical garden plants to see whether they are comfortable at their present locations. I will probably need to experience a bit and move them to the suitable locations on the wall.

Friday, 11 December 2015

DIY Vertical Garden for my balcony

I ordered a 18-pocket vertical garden hanging planter from eBay and it should delivery after 15 December 2015. The dimensions are 50cm x 100cm (see below). I noticed that there is green colour planter and luckily I didn't order the black one. I think the green planter will be perfect for the vertical garden.

18-Pocket-Hanging-Vertical-Garden-Planter-Indoor-Outdoor-Decoration-Herb-Pot
Picture from eBay


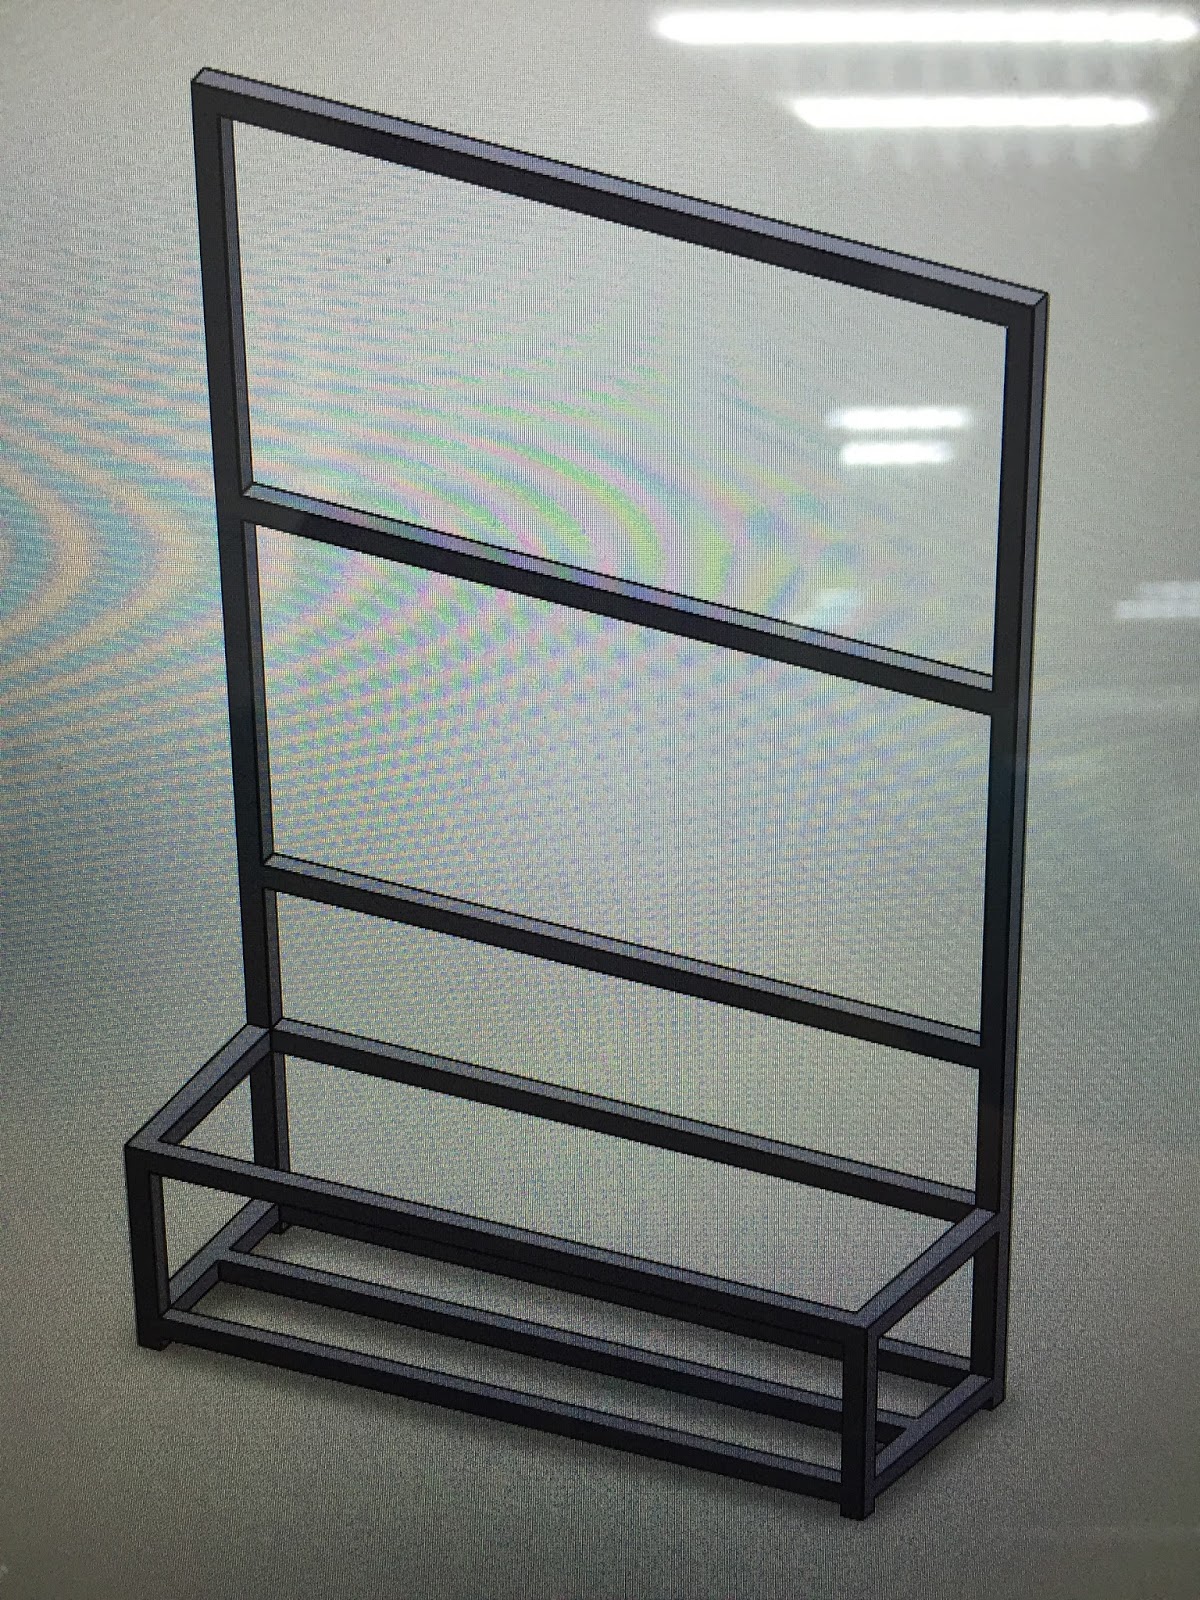
Initially, I thought of just having one 18-pocket planter. But my wife said that it is not big enough. So, I started to design a frame structure to hold two 18-pocket planters. That will give a vertical garden area of 1m x 1m since I can combine two 18-pocket planters.

2x 18-pocket planters

I will need to hang the two 18-pocket planters onto a frame. The frame material will be aluminium. I have made a couple of designs.

Frame design 1


Frame design 2

I sent the designs to my friend and he thought the frames are readily available in the shop. I told him that I need to provide the dimensions of the aluminium profile bars to the supplier so that the supplier can cut them to the lengths that I need. I will need to get the connectors to join the bars together.

My wife thinks that 1m width vertical garden is not good enough, she prefers to have 1.5m in width. Thus, I will need to increase the 1m to 1.5m. Luckily I have not purchased the bars and still have time to consider the correct lengths to cut. My only concern is that the 1.5m width will make the frame structure weakly and I will need to consider the strength of the frame design. Also, I will need to add another 18-pocket planter to the original design so that I will have 3pcs 0.5m x 1m = 1.5m x 1m planters for the vertical garden.

I checked with the eBay seller whether I can get discount for the additional 2pcs that I'm going to order. His reply is prompt and said that as the price is discounted already and he couldn't get further discount even if I purchase two pieces. The package that I have ordered arrived on 18 Dec and it almost filled up the entire mailbox. I wanted to order another 2pcs but I think I will order it separately so that the delivery will be one after another so that the mailbox can hold one at a time. I don't think the postman can squeeze the two packages into my mailbox. I will wait a few days and when the 2nd package has been posted, I will order the 3rd package.


18-pocket planter has arrived!
The 18-pocket planter arrived safely. It is what I have envisaged and I will use this piece to design the frame. My design idea for the frame is to hang and secure the 3pcs 18-pocket planters side by side. This will cover an area of 1.5m x 1.0m rectangle. I will need to calculate the height of the frame. I plan to have a planter box in front of the frame to hold rectangular plastic pots. In the Frame design 1 and 2 pictures above, you can see the planter box area. I want to buy readily available plastic pots or containers and place them into the planter box area. I will need to buy them and check the dimensions so that I can design the planter box. I will place a plastic sheet onto the frame before I hang the pocket planters. The plastic sheet will extend all the way down to the planter box so that when I water the top of the pocket planters, the excess water will flow down towards the planter box.


Thursday, 3 December 2015

Vertical Garden DIY for balcony

I want to create a vertical garden for my balcony but my budget is less than $400. I think if I were to custom-made one with 1m (wide) by 1.8m (height), it will cost me at least $1K.

Google is your best friend to find the stuff that you need.

Materials that I need:
  • 2x 32-pocket vertical planter (size 50cm width x 140cm height) ~ $90
  • IKEA ÄPPLARÖ Bench with wall panel ~ $184
  • Plants and planting media ~ $100
So, the total is about $374 which is within my budget of $400. Unless I can purchase some wooden stripes to make a frame, maybe the easiest way is to buy the IKEA bench with wall panel.

The above project will start in end December 2015. I will need to check out the bench with wall panel at IKEA first and then confirm the size of the vertical planter pockets that I need to purchase from eBay.